Can You Install Tile Over Tile? Here's What the Experts Say
|
|
Time to read 8 min
|
|
Time to read 8 min
Content updated July 2024
So you’re ready to install new tile, but you’re unsure of one thing: can you tile over tile?
The short answer: while there are times that you can, you probably shouldn't. The longer answer: we’ll get into that!
The majority of the time, you’ll want to start with a fresh installation. This will ensure the longest life for your tiles, both aesthetically and practically. However, there may be times when you can install new tile over existing tile - so let’s take a look at which option is going to give your gorgeous new tiles the best long life!
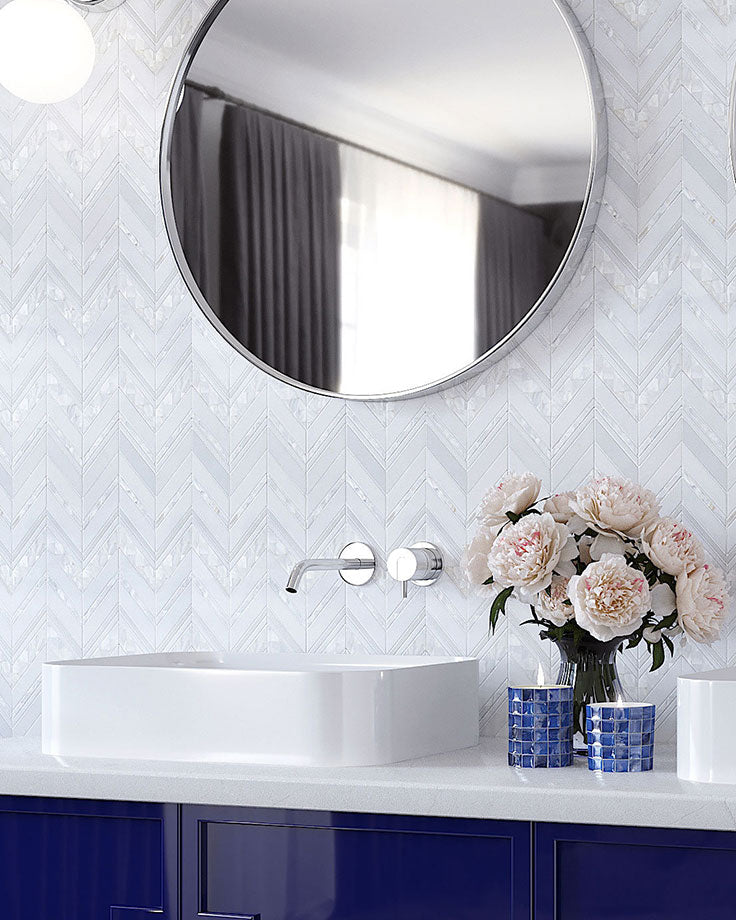
This Pearl Chic White Marble & Mother of Pearl Waterjet mosaic tile will give you all the inspiration you need for your next tile renovation.
Whenever someone is tackling a renovation project or a remodel, this tends to be the first question that they ask. Someone already laid all of that tile, do I really need to rip it out and start over?
While you technically can install new tile over old tile in some circumstances, it’s really a practice that should be avoided. We know - that’s probably not the answer that you wanted to hear! However, that extra demo time at the beginning of your project can save you a lot of time, effort, energy - and MONEY - in the long run.
This pearl and white marble herringbone tile is way too pretty to risk with an improper install!
Here are the top reasons that you should avoid tiling over tile:
The bond between your adhesive and your tile is one of the most important factors in ensuring that your tiling job will last for years to come. To make sure the adhesive has properly covered the bottom of your tile, you want to make sure the wall or substrate where they are being laid is as level as possible. If the surface is uneven, say from a zellige-style tile or where grout lines create a dip, the adhesive won’t be able to properly bond with the bottom of the new tile. You’ll risk having tiles lift up after installation is complete, or even having water leak between the layers and cause rot and damage
Many thinsets and tile mortars are intended to bond with a backerboard or substrate and the bottom of a tile - they may not properly bond with the surface of a glazed ceramic tile or polished glass tile. These tiles have special backings that will provide a firm grip on the bottom, but that doesn’t mean they’re going to make a good surface to tile over.
You want a firm grip on the back of your tiles to make sure there’s no lifting or breakage once they’re installed.
Keep in mind that wall tiles need to be thin and light enough to adhere to your plaster or drywall. That weight will be doubled if you tile over tile, and may be heavy enough to cause damage to your wall. Floor tiles need enough clearance between the surface of the tile and door openings, appliances, and furniture - tiling over tile doubles the thickness of the flooring and may cause fittings to jam or doors to stick.
Tile experts recommend you tile on surfaces that are as pristine as possible. You want to make sure there’s no debris, dust, cracks, gaps, or large pores that can allow room for moisture to seep in or for tiles to settle or shift after installation. The more wiggle room (literally) in your installation, the more likelihood that you risk your beautiful new tiles becoming damaged, cracked, or trapping moisture.
Any one of these concerns can be enough to wreck your brand new tiling job - resulting in a lot more work and money paid out than if you ripped out the old tile in the first place. Not to mention - a good demo day can be quite cathartic! Mask up and grab your mallet and get to smashing!
Check out our top tips for DIY Tile Installation
There are a few instances when you can get away with removing old tiles - or even your entire backerboard - and starting from scratch. While we recommend consulting a contractor or builder to make sure your new installation is going to have the most longevity and be up to code, here are some tips to see if you can consider tiling over tile.
You’ll first want to assess the existing tile installation. Regardless of if you physically can’t remove the old tile or just don’t want to (hey, we’re not judging), there are instances in which tiling over existing tile is fine. If it provides a solid, level and clean work surface free from cracks, crumbling grout, or signs of retained moisture, using the existing tile as a subfloor to new tile can work, and we’ll show you how to tile over tile below.
If, however, you find that your existing tile is unlevel or cracked or has mildew or retained moisture, it’s best to remove it to avoid the risks we listed in the first section.
The Family Handyman demonstrates how to grind off high spots on the existing tile for a smooth, even working surface.
To test that your existing tile is solidly bonded to the floor, lightly tap them with a wood mallet. If any make a hollow sound, they are loose and will not provide the best surface to lay new tiles. To test that you’re working with a smooth surface, simply use a level to see if there are any imbalances. If you have a slight irregularity, you can use a right angle grinder (pictured above) to grind off high spots.
Use a level to ensure your base tile is as flat of a surface as possible
Handyman extraordinaire Bob Vila warns that tiling over an uneven surface will give you a less than ideal end result. For best results when tiling over tile, level out any mounds of dried grout with a sander and secure loose tiles before laying new tile. You can use a tile adhesive to secure any that are loose to create a smooth surface for your new tiles.
Next, you’ll want to lay out your new tiles, cutting them to size to fit around any walls, corners and fixtures. Once you have selected your new tiles, check out the right tile cutting tools and techniques for each material.
An angle cutter makes it easy to make multiple cuts in different shapes and sizes, requiring little finesse to operate.
Once this is complete, move them out of the way and clean the original tiled surface with a degreasing soap. Let the surface dry completely before moving on. You want to have the most pristine surface possible to lay out your adhesive and secure the tiles as firmly as possible.
Clear your existing tile well with a degreasing soap. Be sure it dries thoroughly before moving on.
Before laying your adhesive, you’ll want to make sure you have the right trowel to apply your mortar and create the best bond for your tile. This will depend on a few key factors - the size of your tile, and the flatness of your surface.
Since you’re laying tile over existing tile, you’ll want to ensure you have enough mortar laid down to provide a strong grip and ensure there are no gaps or spaces between layers of tile.
Read More: How to Pick the Right Trowel for your Tiles
Find the right adhesive at your local home improvement store, and a gorgeous hexagon tile at Tile Club!
Now that you’ve got your adhesive picked out and your surface free and clear of any dirt or debris, you can begin the new tile installation!
Start by scooping your adhesive from the bucket with a trowel, applying a thin layer to a small section of tiles. You’ll want to avoid applying it to a large surface area to ensure you’re not laying tile on drying adhesive. Score the surface adhesive with the toothed edge of your trowel, drawing straight lines along the wet surface. (see below)
A kitchen backsplash tile project depicting the correct way to apply thinset behind our Mallorca Blue ceramic subway tiles
Firmly press new tile over the small adhesive area you’ve just laid, sliding the tile perpendicular to the combed lines. At this point feel free to rotate through laying tile, spreading adhesive and scoring until all tile is securely in place. Once your tile is set, let it sit to dry. This could take 24 hours or more, so be patient!
Now that your tiles are in place and the adhesive has set, you’re ready to seal the spaces between them with grout. For smaller grout lines (⅛” or less), unsanded ground is typically recommended. Unsanded grout works better on flooring and wall tiles with grout lines larger than ⅛”, since it resists shrinking and cracking better than sanded grout.
This gorgeous recycled glass herringbone mosaic tile perfectly illustrates the elegant look small grout lines can achieve.
Keep your grout clean and free of unnecessary moisture, debris or dirt by sealing it with the right sealer. Penetrating sealers work best in damp areas like bathrooms and showers, while membrane-forming sealers are ideal in kitchens. Don’t miss our post on how to properly seal grout if you choose to do so.
If you’ve made it this far, congratulations! You have officially earned bragging rights while answering the question of whether you can lay tile over tile. Now all that’s left to do is sit back, relax and enjoy your newly tiled space!
Tile Club’s Topaz Marbled Glass Hexagon Mosaic Tile brings a fun, bright and inviting look in your home.
There are a number of factors to consider when choosing a new tile. To be sure your selection is the ideal choice for the intended application, (some tiles work well as bathroom wall tile, but not bathroom floor tile, for example) ask yourself these 7 questions before picking out your new tile. Then, check out our gorgeous selection of bathroom tiles, kitchen and backsplash tiles for the wall and floor tiles of your dreams. We even have peel and stick tile for DIY backsplash tiling made easy!
Lindsay Fluckiger is a shining example of what happens when passion meets expertise in the digital marketing world. With a robust background in social media marketing, contract negotiation, social media advertising, and influencer marketing, she has become an integral part of every team she's worked with.
Her journey in the digital space took a significant leap forward at HGTV, where she served as the digital marketing manager for designer and TV personality Breegan Jane. Here, Lindsay's skills in content creation, social media and brand strategies were pivotal in driving digital transformations and boosting brand visibility.
Previously, Lindsay sharpened her skills at INK Public Relations, a boutique firm representing heavy hitters in the design space based in Los Angeles. Managing the social media presence for high-profile clients such as TRIO Design (Angela Harris) and Brandon Architects, she distinguished herself with her expertise in contract negotiation and social media advertising.